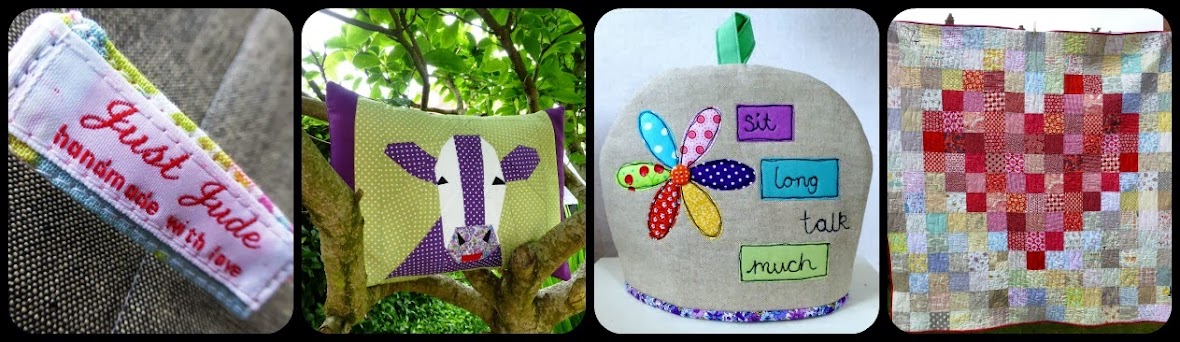
Saturday 30 July 2011

Crazy Daughter Quilt Complete

And here she is!


This quilt is called Crazy, not because my daughter is crazy!  No, crazy because the patchwork technique used to make the blocks is called crazy patchwork - one of my favs because you get to use up all your scraps.

This was a first for me using basting spray, and I have to say it made the quilting of this large quilt much, much easier under a conventional machine. 

I quilted diagonal lines through the blocks & wavy lines through the sashing.

A few down sides to using it are:

1. It's not cheap at £7 a can (& I used 2/3 can on this baby) 

2. My LQS told me to spray a section at a time and iron the quilt top down on to it as you go (& same again for the back).  Tricky enough with a large piece on a small ironing board and not letting bubbles of fabric appear.  But made more tricky if you have a hairy, thread covered carpet like mine, as the large quilt, drapped over the ironing board somehow managed to pick up lots of extra threads which I was forever picking out of the spray glue!

Note to self: Hoover carpet before spray basting, and don't start it at 10.30pm at night when you need a bit of muscle power to work with it!

Apart from that, I would definitely recommend spray basting quilts, especially larger pieces.  You get a slight stiffness to the quilt, which is what makes it easier to quilt, but then you MUST wash the quilt afterwards (I'm not a huge fan of the 'wrinkly goodness' look to washed quilts I'm afraid, but no biggy for the benefits of easier quilting!).


So I guess I can now remove the Crazy Scrappy Quilt-a-Long button from Aneela I've had on my sidebar since April! 
 
Job done, lovely quilt, happy daughter (who's really not crazy!).


Quilt dimensions:  Finished size 50" x 70"
                           Block size 11" x 11"

Friday 29 July 2011

August Brit Bee Blocks

A truly wonderful, fizzy, whizzy package arrived for me today.

All the way from Lerwick in the Shetlands (that's practically in Norway!) and my lovely bloggy friend Sarah.


Sarah is Miss August in our fab Brit Bee, and has thought of everything from mood music (while we sew), to energy food (that's chocolate to you & me!), fabric of course and a nostalgic fizzy drink powder called Kramola Fizz - what fun!!!!

And to top it off, Sarah has given us free reign as to what blocks we come up with using her gorgeous selection of fabrics.  Yippee!  


Time to get the creative thinking cap on!

Thursday 28 July 2011

Hello Joe!

My friend had a baby boy this week, and I found out yesterday he's to be called 'Joe'!

So this morning, I made a cushion for Joe:

Yes, more sketching applique - I think I'm addicted!
I hope Joe's mama likes it!

  
Hap-bee Thursday!

Wednesday 27 July 2011

A Sketchy Welcome!

I've been working on my new programme of classes, starting in September, and thought I'd do a few posts about some of the projects I'm planning to teach.

I try to make/design things that I'd be happy to have in my own home.  Today I'll show you my Welcome Wallhanging!

I wanted a rustic yet modern banner for my hall, and so combined linen with New England colours, and applied an applique technique called 'Sketching'.
  

Sketching is a form of Free Motion Quilting (FMQ) and it is great fun because to achieve the desired look, you really want a few wiggly lines in there - perfect!!  Poppy Teffrey's book 'Free & Easy Stitch Style' was my inspiration.


I adapted a Microsoft Word Font to get the lettering just right, and have templates printed out for the class to use. The wire quilt hanger (16") was from The Cotton Patch, but I've also seen them on Ebay and other online suppliers.

In order to free motion quilt on your machine, you have to be able to either drop the feed dogs (the zagged edged feeders under the needle plate) or cover them over with a specially fitting cover.  Have a look at your instruction manual for how to do this on your machine, or take your machine to your local Sewing Machine suppliers & they will show you how.

You will also need a FMQ foot (or Darning foot) for this technique.

This is for a Janome, but most FMQ feet are similar in shape.

The finished size of the wallhanging is 8" x 20".  At the moment we are in the process of painting our hall/stairs/landing (in a 3 storey Victorian semi!!!).  I'm looking forward to getting the painting finished so I can hang up my 'Welcome'.


I have to let you into a secret!  This is the 2nd Welcome Banner I've had to make.  The first one ended up looking like this after the dog decided she wanted her own personal welcome.......

She has a fetish for buttons!  She ate all 5 of them!
She did me a favour really, because in making the 2nd one, I decided to iron in some vilene (which helps the banner hang better) and I shortened the hanging tabs.  Having said that, I'm not ready for her to become Quality Control on future designs!

I hope this 4 week project appeals to folks, who can easily adapt the colours and style to suit, use up some scraps, and also get a fun introduction to FMQ.

Tuesday 26 July 2011

Fluttering Hearts and High Blood Pressure!

I've had one of those days.

You know the ones where you wake up feeling energised and ready to get a lot done, but as the day goes on, everything gradually unravels?  'The best laid plans ....' and all that!

I'll spare you the infinite details, but they boil down to this:

1. Trying 2 fabric shops looking for a particular shade of green fabric for a class project - fail!

2. Making a start on said project regardless, but sewing 100 hsts to 100 rectangles before realising the hsts were meant to be cut in half again, making 200 hsts to sew on either end of the rectangles - fail!

3. Getting myself comfortable to work over lunch & unpick horrid hst mistake, when my parents call for an impromptu 2 hour visit - lovely to see them, but no work done - fail!

So this evening, I recut the unpicked hsts, put them to one side, and made 2 applique heart blocks for Caroline's Heart Appeal instead - Success!


Plus, the sun shone ALL day - yippee!

So not a total failure of a day!

Monday 25 July 2011

Have a Heart!

Caroline of Serenity Quilts is having a Heart Appeal in aid of Cancer Research.


Basically she needs as many folks as possible to make & send her a simple 8" square with an appliqued heart on it.  Caroline will then make up quilts to auction.  She wants to raise £400 in August, and has many personal reasons for doing so.  

My mum is recovering from breast cancer so I definitely wanted to support Caroline in her efforts.

I already know what type of heart I'm going to do.  Here's a mini version I made a few weeks back:


If you would like to help in a really easy way, please check out Caroline's blog for more info.  She'd love your support.

Sunday 24 July 2011

Beginners' Makes

Well my Beginners worked liked trojans yesterday and got their log cabin cushions finished.


This was day 3 of 4, and it all came together for them - they loved it.  Some of them haven't sewn before, or in a long time, and certainly haven't made a cushion before, so the smiles were just a picture.

How creative they were, recycling lots of textiles.
With some time remaining, they quickly got stuck into cutting and starting their handbags.  

They'll get these finished on their final day with me next month, and I'm sure I'll have more smiley pictures to show you.

A big 'thank you' to my right hand woman, Sarah, for her amazing support and assistance during the day.  You make life a lot sweeter!

And today?

The sun is shining brilliantly in an amazing blue sky, and I've had almost a whole day sitting outside enjoying my garden and sewing hexies.


My shins have turned a lovely shade of spit-roast pink (think they might be sore tonight!) but that's okay - in 2 days time they'll be back to apple-white!

Before I go, I must recommend a book I've just finished - The Thirteenth Tale, by Diane Setterfield.  


This is one of the best books I've read in a long time, AND it has a satisfactory ending (how rare is that?).  I got this one from the library.  If you like a bit of mystery with an historical edge thrown in, then you'll enjoy reading this one, and it's brilliantly written.

Have you read anything good recently, with a really good ending?

Enjoy the rest of your weekend.

Friday 22 July 2011

Steaming Ahead!

Today was (almost) bliss!

The sun was shining, and all 3 children were out of the house at the same time, for at least 2 hours!

I am fairly well caught up with work projects (starting my Beginner's group on a new project tomorrow) so thought I would treat myself to some of the many 'fun' projects I have on the go!

Firstly, I started quilting Crazy Daughter Quilt ..............

Going for diagonal lines through each block.  Not sure what I'll do in sashing yet.
......... but then ran out of chalk and thread!  

Despite eating into my precious free time to take a wasted trip to my LQS (they didn't have the thread colours I needed!), I was undetered, ordered some thread online, and hastily returned to my sewing room to start on something else.

The something else was my very neglected Kaleidoscope quilt.

I chain pieced like a demon and just to make sure the half blocks will align in the middle, I completed a block to reassure myself.


There's a heck of a lot of sewing stages to this wee gem, which is playing havoc with my indecisive creative mind, meaning I'm constantly changing designs the more I see this evolve.  


(More on that later when I finally decide on what this thing is going to look like.)

Finally, I went bin hoaking!

Just into my recycling bin to find some glossy/magazine type paper to use for my hexie papers.  I was taught to use slightly thicker/better quality paper as templates, and they are much easier to sew around.

So, cut, cut, cut, cut and I made lots of papers to stash in my vintage tin.  

When I was cutting a folded over leaflet, I had a bit of a eureka moment!

(This doesn't happen to my slow brain v.often so please humour me!)  

Let me demonstrate with this piece of A4 paper folded in half lengthways:

The fold is at the bottom, look closely at those little triangles in between the hexies.
After cutting out the hexie shapes, I noticed some other shapes appearing in between the hexies, and it turns out, when you open them out, they make great kite shaped papers. 


These can then be sewn up in fabric, to make a lovely addition to the hexies.

The design possibilities are endless!
I'm sure lots of you have already discovered this & have probably been making them since before you were weaned!  But I thought it was pretty cool.  

I don't have sophisticated design software to cleverly magic up shapes and designs, so I tend to arrive at these things 'old time'!  I would like to incorporate them someway into a hexie designed project, but it might be a bit of a stretch for my inept mathematical mind!  
Maybe I'll have another eureka moment this time next year!

Have a great weekend!

Thursday 21 July 2011

A Step Back In Time!

Last night I decided I would indulge in a little hand sewing while watching utter rubbish on TV!

I've picked out some vintage inspired fabrics (some are genuinely old!) to get started on my hexies (part of the Hex-A-Long being hosted by Lily's Quilts).


While rummaging through the 'stuff everything into it and forget about it' drawer, I came across my old hexie templates and even some old papers I'd used before, as well as some gems that a family member had passed onto me a few years ago.

Scissors still in their original leather zippered pouch!  And that's velour in the lining!

I think this is a heron?

The cutest thing ever .... look what they become ....

Tiny fold out scissors - and they're really sharp!!


Most of the original needles are still there!

And what could this be?

A needle canister!
There's something about English Paper Piecing that stirs up romantic notions of an era gone by!  So I decided to make this project truly historical and vintage by combining really old (but fully funtioning) equipment with my vintage inspired fabrics.


And so, with a vintage tin to keep everything in, I'm sorted and ready to hex-a-long!


Happy Hexing!

Wednesday 20 July 2011

Dreadfully behind!

I have been extremely busy this week designing and making projects for my next program of classes, starting in September, as well as preparing for new classes this week, as well as trying to keep 3 bored kids happy without feeling like a really selfish, guilty mum (actually I think Guilt just comes with the Placenta)!

Next week I hope to do a series of posts on the new projects that I'll be teaching, with some pics of course (oh but that means I'll have to get them all made -eeek!).

Anyway, I didn't wanted you to think I've been spending all my time sunbathing in this glorious, grey summer we've been having!!

Tomorrow night is the start of the Beach Huts Cushion class:


This is a great wee project to introduce folks to Foundation Piecing (one of my favs!).

Despite our cold, drab weather, I'm hoping this sunny project will make us all feel brighter!

So because of all this hard work, I'm ridiculously behind in my Kaleidoscope Quilt (a QAL being hosted by Don't Call Me Betsy) and I haven't even picked out fabrics for the recent Hex-A-Long (hand sewn hexies). 

Here's as far as I've got with my Kaleidoscope quilt:


I'm doing my usual 'changing the design as I go along' thing, seeing what it looks like as I go.  I just need a bit more 'go'!

On Sunday I try not to do work stuff, and if I get any free time, I'll try and work on other WIPs.  

So I got Crazy Daughter Quilt basted.  I used basting spray for the first time, following the instructions of my LQS to do it over the ironing board, bit by bit, ironing it down as I go.  

This technique pretty much worked, but as with doing anything with large quilts, it took a chunk of effort and time. The effectiveness of it will be tested by the quilting - whenever I get round to it!

So that's it for now.

Sorry if this has been a bit moany!  I'm tired and need a holiday (or just some rays would do!)

Monday 18 July 2011

Log Cabin Cushions Completed

I finally got the last of my lounge cushions finished today (or 'pillows' for my international friends!).

I've pieced & quilted 10 fronts & backs, and button holed 2 envelope backs, using a mixture of new fabrics (my winnings!) and chopped up clothes e.g. corduroy skirts, trousers, & other clothes belonging to my family!

Here's the first set - 2 x 22" log cabin cushions and 2 x 18" scrappy stripped cushions.


These 4 cushions all have zippers
And the purple set - 2 x 18" cushions with button hole envelope backs.


My daughter's corduroy trousers & some old duffel buttons made the perfect envelope band!
It's lovely seeing them on my previously 'naked' sofa.

Now I just have to keep the dog off them!!  (easier said than done!).

Sunday 17 July 2011

Come Hex-a-long with me!

A new summer quilt-along group has started up, by Lynne (Lily's Quilts) and Gayle (Gayle Brindley's Blog).

The idea is to get familiar again with the age old patchworking technique called English Paper Piecing (EPP).

EPP is hand sewing pieces of fabric over paper shapes (e.g. diamond, square, triangle, hexagon etc.), then hand sewing the shapes together before finally removing the paper inserts.

I have fond memories of paper piecing when I first started my City and Guilds Textile & Design course.  EPP was the very first thing we did.  

Early works! My college samples - hexies

Triangles

Diamonds

Scallops - my least favourite!
I discovered a joy in hand sewing that I didn't know existed.

It's lovely to be re-inspired by this traditional technique, especially with all the wonderful new designs and fabrics that are around at the mo.

And this is the perfect project to pack away and take on holiday - compact, quick, easy, transportable, perfect!

The Hex-a-long will focus on paper piecing hexagons and this is the inspiration quilt that started it:
“Candied Hexagons” by Liz from Broderie
Fancy joining in? 

Check out the flickr group for more stunning projects & ideas and then join the Lily's Quilts group.  

See you there!