
So here is a quick tutorial on how to make an 11.5" (unfinished) Strip Pieced Block without foundation paper or fabric.
The centre/white strips in my blocks are all 2" wide. All other strips used are of varying widths.
Use a scant 1/4" seam allowance.
Step 1: Measure a white 2" strip diagonally along a 12.5" ruler, making sure it is slightly longer than the ruler (this will be the centre strip, which creates the secondary white diamond shapes).

Step 2: Lay 2 patterned strips either side of the centre strip, making sure they are either the same length as the centre strip, or long enough to extend beyond the edges of the ruler. Sew the strips either side of the centre strip and press the seams away from the centre.


Step 4: Continue adding strips until the ruler is covered. (Note: When you reach the corners you may want to use a wider piece of fabric, rather than narrower strips.)


Step 5: Aligning the ruler - this bit is important!
Place the pieced strips onto your cutting mat, with the centre strip laying vertically. Next put the square ruler on top, making sure the diagonal line on the ruler is centred evenly along the centre strip with the numbers on the diagonal line running from 1 at the top down to 12.5 at the bottom.

At this stage we are making sure the top adjacent edges of the ruler are as far up as they can go without missing the edges of the fabrics. When you look at the bottom adjacent edges of the ruler, it appears that there isn't enough fabric, but remember we are trimming this block to 11.5" (not the 12.5" ruler size). As long as the bottom edges of the strips are within the 11.5" lines on the ruler, then we will be ok!


Step 6: Trim away the excess from the top 2 edges only.

Step 7: Turn the block 180 degrees and realign the ruler so the diagonal line is centred again down through the middle white strip, with the numbers running from 1 at the top to 12.5 at the bottom, as before.

Step 7: Place the 11.5" lines of the ruler along the trimmed bottom edges of the block. This will reveal the excess fabric needing to be trimmed at the top of the block. Carefully trim these without letting the ruler slip!


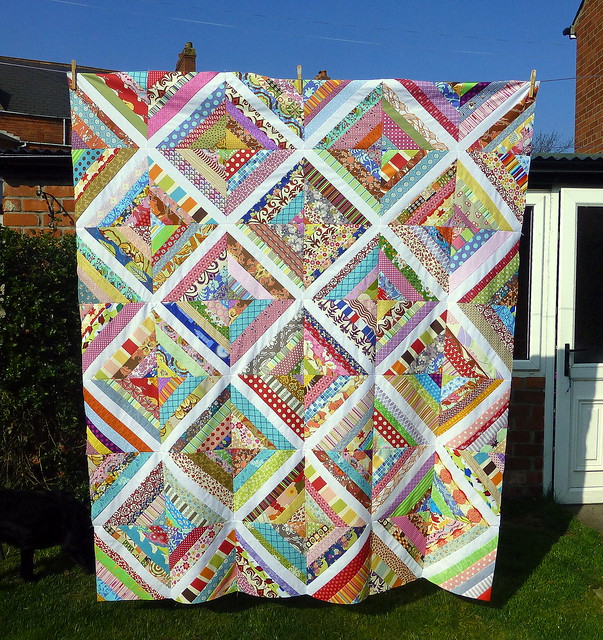
And that's it! A finished strip pieced block!

When you make lots of blocks and sew them altogether, all you need to match up are your centre white strips! Simples!
You can of course make these blocks any size you wish. However if you want to go larger to a 12.5" unfinished block, just make sure you extend your fabrics strips a little bit further beyond the 12.5" ruler.
I hope you have as much scrappy fun as I did making these easy blocks!
Jude xo
Excellent. Thank you!
ReplyDeleteGreat easy tutorial - thanks! One day ....
ReplyDeleteLooks beautiful and fun! Thank you for the great tips! x Teje
ReplyDeletelooks great and a fun way to use up those odd little strips that sometimes linger
ReplyDeleteThis is a great way to use up scraps. Thanks Judith.
ReplyDeleteLooks like a fun block to make!
ReplyDeleteI can absolutely see some of these in my future. Thanks for sharing. x
ReplyDelete