
With less than 3 weeks until Easter Day, I think it's time we got started on some fun tutorials, don't you!
And to kick us off, how about some cute drawstring Bunny Bags!
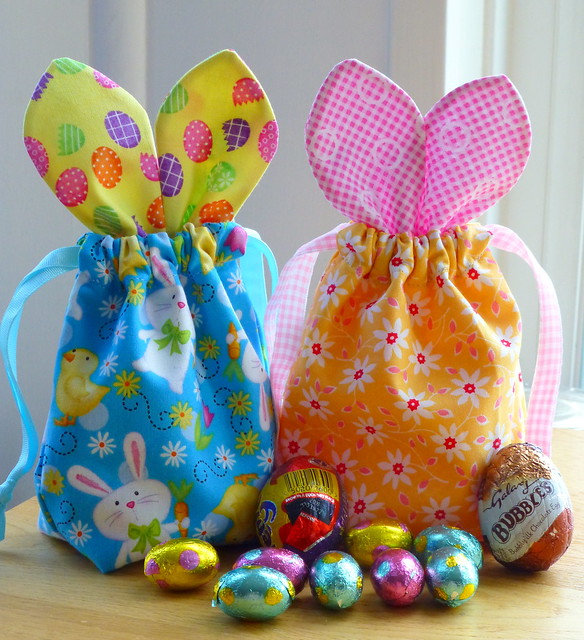
How cute are these! The perfect size for filling with small chocolates and eggs!
Bunny Bags!
Approx. 4" wide by 7" tall (incl. ears!)
You will need:
Outer Bag: 2 x (6" wide by 8" tall)
Lining: 2 x (6" wide by 8" tall)
Ears front: 2 x (2.5" wide by 4.5" tall)
Ears back: 2 x (2.5" wide by 4.5" tall)
Lightweight iron-on vilene: 1 x (2.5" x 9")
0.5" wide ribbon: 2 x 17"
small safety pin
Assume 1/4" seams
Download 'Ear' template here.
1. Iron the vilene onto the wrong sides of 2 matching ear fabrics. Cut the 2 pieces apart. Using the ears template, draw an 'ear' onto the wrong sides of the other ear fabrics.

2. Place (different) ear fabrics right sides together and sew on pencil line (use a reverse stitch to start and finish). Trim away excess fabric, leaving 1/8" seam allowance.

3. Turn the ears right sides out, press and turn under the open ends. Sew across the ends as close to the edges as you can. Put to one side.

4. Place the outer fabrics right sides together. Mark 2" down from both top corners.

5. Sew around sides and bottom from marker to marker. Repeat for the 2 lining pieces, but leave a 2" gap in the bottom edge.
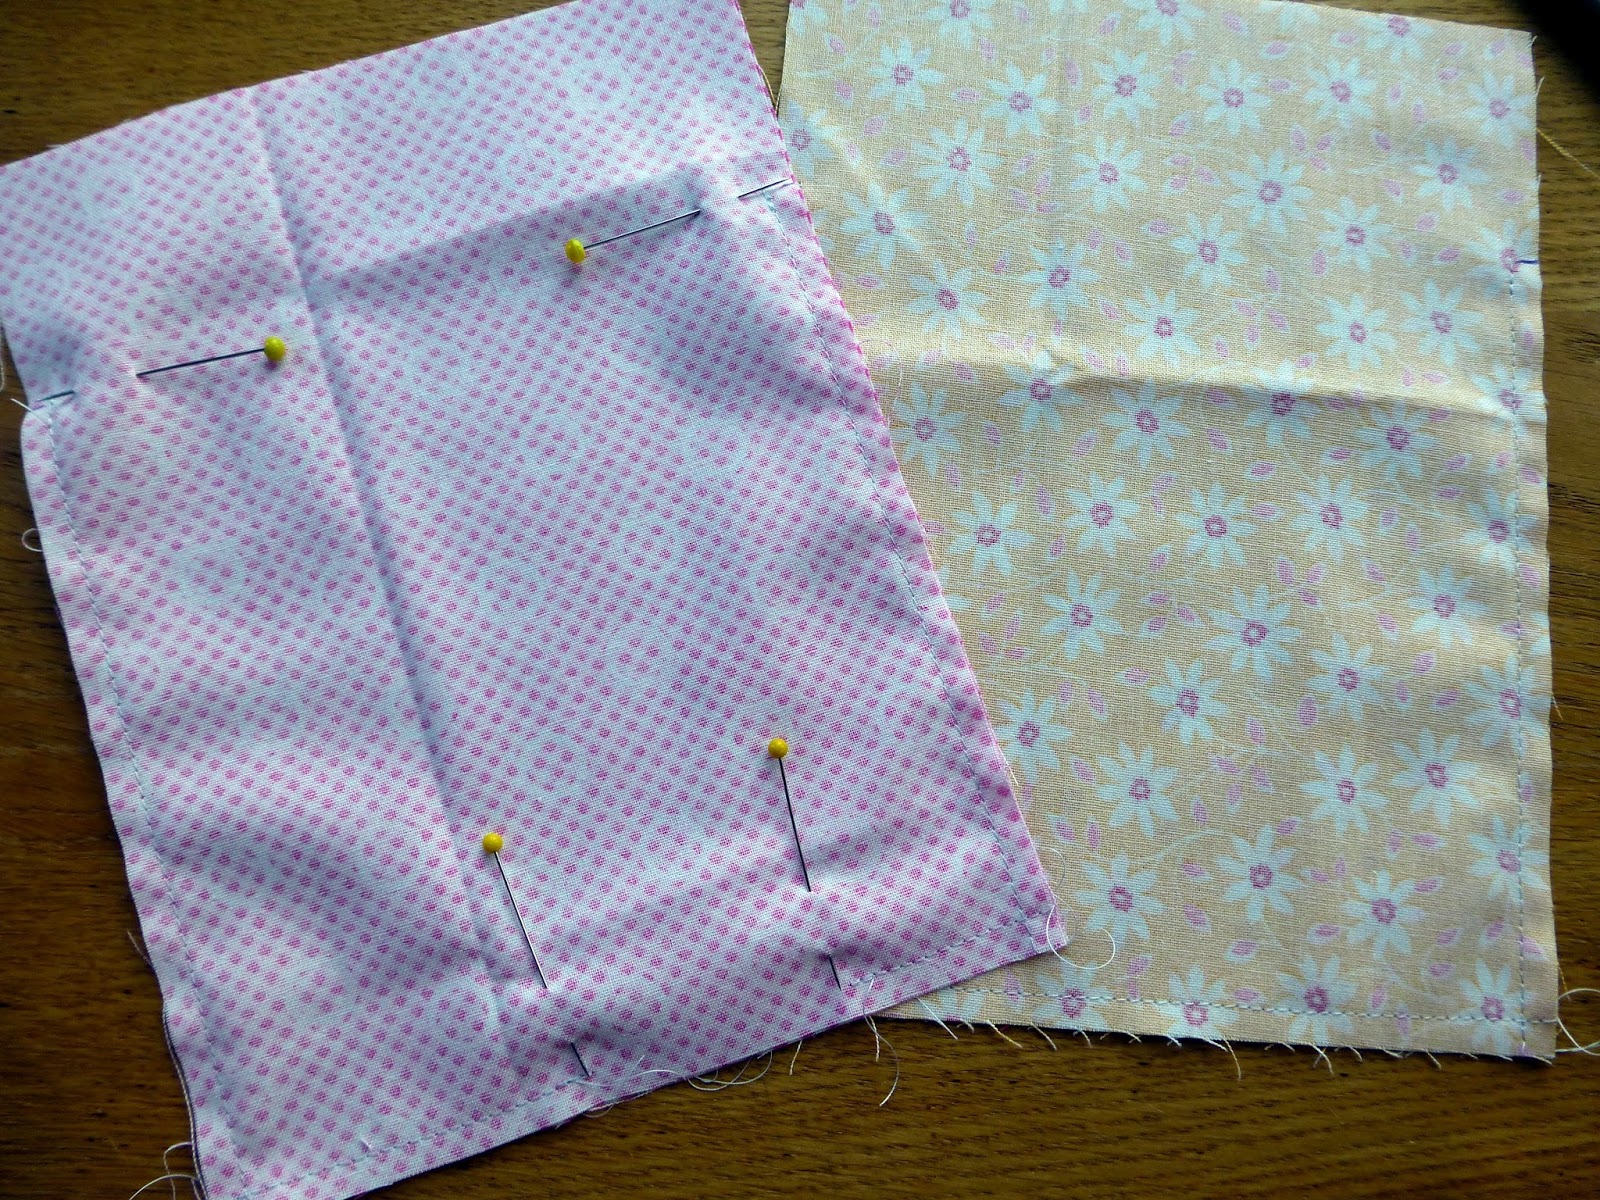
6. Pull the corners apart and place the side seam on top of the bottom seam. Measure 1" along the seam from the point (this will give you 2" vertically). Mark the vertical line and sew along this line. Repeat for both corners on outer bag and lining.


7. Place the top 'flaps' right sides together, outer fabric with lining. Pin at the point where the side seams meet.


8. Sew around both 'flaps' between pins at both sides. Use a reverse stitch to start and finish, and take care not to sew into the existing seam.


9. Turn bag right side out through the gap in the lining. Hand or machine stitch the gap closed and press well.


11. Pin the ears onto the remaining (turned under) flap leaving approx. 1" between the ears at the bottom. Sew along the edge of the flap and along the bottom of the ears. Use a reverse stitch to start and finish.

12. Attach the safety pin to one end of the ribbon and pass through both channels until it comes out the same side where you started.

13. Knot the ribbon ends together and repeat for the other piece of ribbon from the opposite side.


And you're finished!

Fill up the bag with chocolate goodies and pull the drawstrings to close!
(I guarantee you it won't stay closed for long!!)
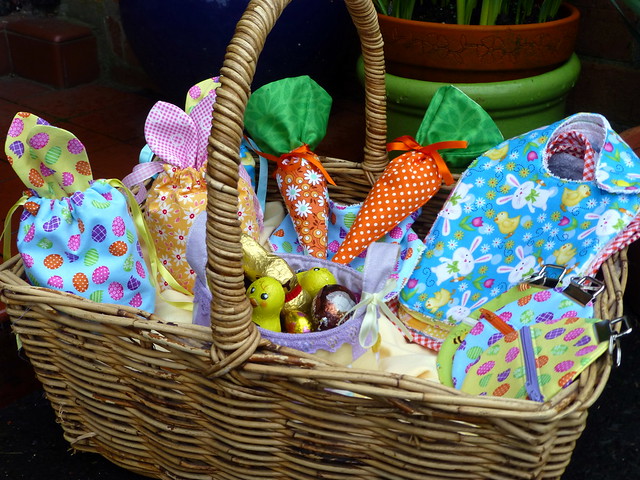
Tune in again for more tutorials on everything you see here in my Easter basket!
Happy Easter Sewing!
(If you don't want to miss out on any tutorials, why not 'subscribe' by filling in your email address at the top right of my blog home page! That way you will automatically be notified via email when I next post on my blog.)
Jude xo
So cute!
ReplyDeleteI love these!
ReplyDeleteThese are so cute! Definitely going to have to try and make these!
ReplyDeleteThat is just so cute Jude!
ReplyDeletethese are so cute, plan on doing for the ladies at my office for Easter 2017 :)
ReplyDeleteLove these. I am making a bunch for my nieces and nephews.
ReplyDeleteI love these. I just made one using print fabric for the bag but fuzzy felt for the ears (one layer - no sewing around the ears). It came out super cute! Thanks!
ReplyDeleteAmeiii...Loveeee
ReplyDeleteYou have a good point here!I totally agree with what you have said!!Thanks for sharing your views...hope more people will read this article!!!
ReplyDeletedesigner handbags made in italy
Great blog is this!6pm Coupon
ReplyDeleteCute idea but it took quite awhile to make....thanks for sharing
ReplyDeleteAlthough I have no children this is so cute I think I would like to make them anyway. Have you ever considered having a button so folks could download a PDF of your cute tutorial projects?
ReplyDeleteThank you, I'm making 6 of these cute bags for my grandchildren and using white/pink felt for the ears.
ReplyDeleteThese bags are so cute! I'm not familiar with Vilene, though, and when I Googled it I got several different definitions. Is it a water-soluble stabilizer? Or a permanent stabilizer? I'm more of a quilter than a sewist, so I appreciate your guidance here. Thanks very much for your help.
ReplyDeleteThank you for sharing this valuable knowledge.
ReplyDeleteI've read a lot of blogs, but I've never seen anything quite like this. When you will buy the stylish vintage designer handbags online, you just have to look that what kind of Brand you use. The Vintage Bag Collecton has a number of stock of all brands such as Prada crossbody bag, Valentina leather bag, and so on.
These are honestly adorable, perfect little bags for treats. The ears detail really makes them stand out, and the size is just right for small gifts or party favors.
ReplyDeleteLove how clearly everything is laid out too, makes it way less intimidating to try. If you ever want to experiment with more durable or fully customizable options for events or branding, we do branded mylar bag packaging: https://www.brandmydispo.com/collections/custommylarbags that can be tailored to any size or style.