Showing posts with label applique. Show all posts

Friday, 23 September 2016

Folksy Tea Cosy!

Sewing World asked me to make a Scandi inspired Tea Cosy for their October issue.

After much deliberation I broke with tradition and chose felt to best illustrate my design.
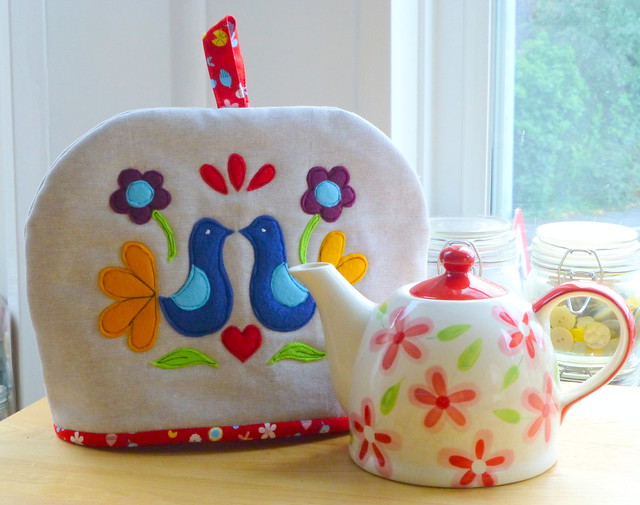
Folksy Tea Cosy

I used my trusty Essex Yarn Dyed Linen (Flax) for the background.  I think the rustic linen gives a lovely foundation for the tactile felt.
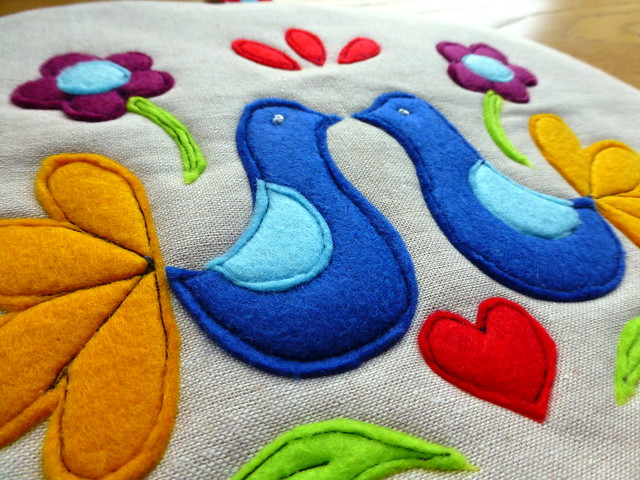
Folksy Tea Cosy

I bondawebbed the shapes down (took quite a bit of heat to adhere) and then had to decide on how to applique them.

I haven't free motion sketched on felt before so wasn't sure if my risky decision would pay off.  But I'm really pleased with the added texture it gives to the felt.
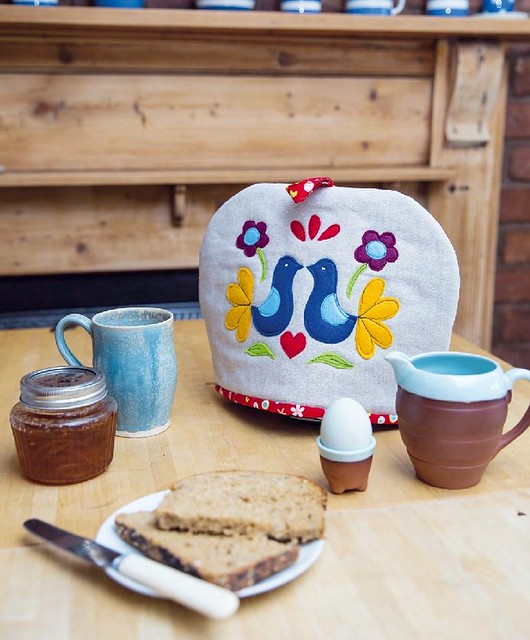
Folksy Tea Cosy
Photo: Sewing World
I hope you like my cute cosy, and my nod to all things Folksy!

(The October issue of Sewing World is in the shops now.)

Thank you everyone for your continued comments.  I always reply to comments, so if you don't get a reply from me or an answer to your question, it means you are a 'no reply comment blogger' and your email address doesn't register with your comment. Please leave your email address in the comment box so I can reply to you.


Jude xo

Wednesday, 28 November 2012

The One Where I Forgot Something!

Working from home during the day means I have the privilege of being able to look after a couple of my friends' kids after school, several afternoons a week.

I know when their birthdays are, and I usually pride myself on being organised well in advance when it comes to theirs (& everyone else's) birthdays!

But I slipped up this week!

One of my Tuesday/Wednesday girls' birthday was on Monday.  I knew it was the 26th.  I've had her card written and set out from the beginning of November.  I always make her and her sister something for their birthdays.

Not realising how quickly November was disappearing like sand through my fingers, and foolishly thinking I still had plenty of time, I awoke Monday morning, checked the date, and then screamed!!

Ok, so that was a slight exaggeration!  I gasped in shock with hand to forehead (i.e. slapping myself on the head for being so remiss) and then wracked my brains all day trying to come up with an idea.

I managed to start working on my idea on Monday night (in class!!!) and got it finished yesterday, wrapped up and in time for youngun' coming through that door at 3pm!  Phew!

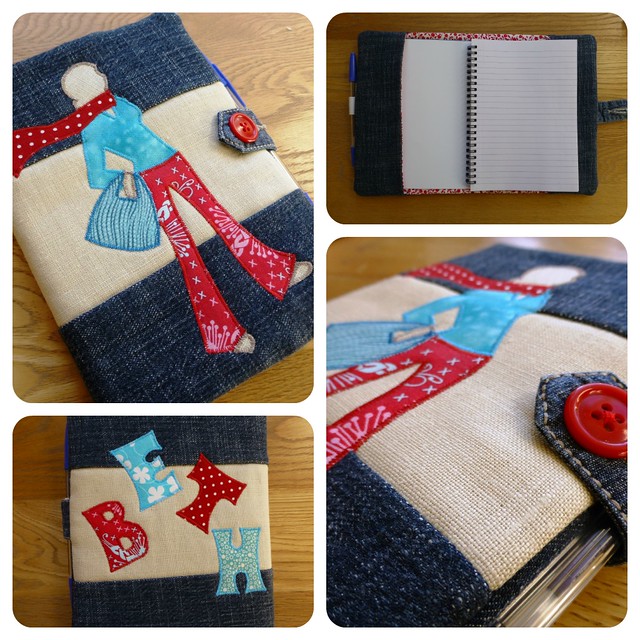
Journal/Notebook Cover Nov12

The smile and delighted reaction from this wanna-be fashion designer made it all worth while!

I think birthdays should last a couple of days anyway!  Don't you?


Wednesday, 7 November 2012

These are a few of my favourite ....

.....vintage scraps!


And I have put them onto this ...


My 2nd ever A line skirt, but this time, with lining!  Ooooooh!  Aaaaaaaah!


I was so inpired by the ladies making their skirts last Saturday, that I wanted to make one for myself. 
I dug out a remnant of navy wool and some shiney stuff I've had forever for the lining!

This was made using the same bespoke method we used on Saturday, drafting our own pattern from our measurements.

I put the zip in the side of the skirt with a wee button hole fastener.   


I was amazed at how easy it was to put lining into it (call me old-fashioned but I much prefer a lined skirt!). 

Sorry about the naff pics!  Will try to get some better ones when I can borrow another camera.

I had this made in an afternoon, and was so excited that I got another one cut out. But I will need a bit more courage to wear it in public!


I'm going to have to give my inner-hippy some serious talking to to stride out in this one!

Monday, 22 October 2012

New Classes for 2013

I always get really excited (& a little bit nervous) when I release my program of classes for the next term.

Since September, folks have been asking me what I'll be teaching next year!  Well, you don't have to wait any longer.

You will find the full program of In Stitches classes for January to March here.

I like to rotate some of my projects through all the different classes, but I also try to put some new stuff in there too!

Like English Paper Piecing:


I had decided during the summer to introduce some EPP into my program, but it wasn't until a few weeks ago that I was convinced it was the right decision. 

I was teaching hand applique (needleturn) and was feeling a little nervous about how this lot of hard-core machinists would take an evening of sitting still working on hand sewing projects.


Turns out I had nothing to worry about!  The entire class loved the peace and quiet and stillness after a busy day, especially as they could sit and chat more!  They were even much easier to teach too!

So I'm really looking forward to introducing them to some EPP next year!  This small wallhanging is a good place to start, and even though hexies seem to be all the rage at the moment, I thought diamonds would give them even more creative possibilities.

Tune in tomorrow for previews on more new projects!


Tuesday, 19 June 2012

Autumn Classes Preview 1

I will be publishing my Autumn programme of classes on Friday, so I thought I'd do a few preview posts on some of the projects we'll be making in class.

First up is something you have already seen this week in my new Blog Header:


Due to popular demand, I will be running an Applique skills class, where we will be learning 4 main types of applique.

1. Satin Stitch (machine applique - as shown in the Love cushion above)
2. Free Motion Sketching (machine applique - see below)


3. Needleturn (hand applique):

Inspired by this picture.
These cushions are approx. 18" x 14", which means those super mini quilts hanging on the washing line are less than 4" finished!

4. Reverse Needleturn (hand applique)


The class will be mainly techniques based with the option of making 1 cushion. 


The cushion borders have been mitred at the corners, which is another technique I've been waiting to teach.  I used recycled denim for my borders, and I think the mitred corners help to frame the applique pictures.


Applique is a lot of fun when you find a technique and style that works for you.  The creative possibilities are endless!


Thursday, 10 May 2012

All You Need Is ......

...a 'Secret Squirrel' hat and mac!


Covert operations abound! Not allowed to tell yet what these will be!


But just thought I would produce some evidence that I have actually been sewing!

And my daughter has been busy too, producing adorable fimo charms & key rings for me to sell at my classes (just in time for the zippy pouches class).

Just look at this cutie-pie!


They are going down a treat in class, which has given my girl a real boost in confidence.

She has officially finished school now (eek!) and starts 5 weeks of GCSEs on Monday!  Seems like only yesterday when we were making pretend plates of food and funny monsters with the play-doh at the kitchen table!

Oh, and just before I go, one of my students has just started up her own blog (she's really been bitten bad by the quilting bug!).  I'd love it if you could pop over to Sew Fi and say hi to Fiona, and welcome her to blogland.

Thursday, 28 July 2011

Hello Joe!

My friend had a baby boy this week, and I found out yesterday he's to be called 'Joe'!

So this morning, I made a cushion for Joe:

Yes, more sketching applique - I think I'm addicted!
I hope Joe's mama likes it!

  
Hap-bee Thursday!

Wednesday, 27 July 2011

A Sketchy Welcome!

I've been working on my new programme of classes, starting in September, and thought I'd do a few posts about some of the projects I'm planning to teach.

I try to make/design things that I'd be happy to have in my own home.  Today I'll show you my Welcome Wallhanging!

I wanted a rustic yet modern banner for my hall, and so combined linen with New England colours, and applied an applique technique called 'Sketching'.
  

Sketching is a form of Free Motion Quilting (FMQ) and it is great fun because to achieve the desired look, you really want a few wiggly lines in there - perfect!!  Poppy Teffrey's book 'Free & Easy Stitch Style' was my inspiration.


I adapted a Microsoft Word Font to get the lettering just right, and have templates printed out for the class to use. The wire quilt hanger (16") was from The Cotton Patch, but I've also seen them on Ebay and other online suppliers.

In order to free motion quilt on your machine, you have to be able to either drop the feed dogs (the zagged edged feeders under the needle plate) or cover them over with a specially fitting cover.  Have a look at your instruction manual for how to do this on your machine, or take your machine to your local Sewing Machine suppliers & they will show you how.

You will also need a FMQ foot (or Darning foot) for this technique.

This is for a Janome, but most FMQ feet are similar in shape.

The finished size of the wallhanging is 8" x 20".  At the moment we are in the process of painting our hall/stairs/landing (in a 3 storey Victorian semi!!!).  I'm looking forward to getting the painting finished so I can hang up my 'Welcome'.


I have to let you into a secret!  This is the 2nd Welcome Banner I've had to make.  The first one ended up looking like this after the dog decided she wanted her own personal welcome.......

She has a fetish for buttons!  She ate all 5 of them!
She did me a favour really, because in making the 2nd one, I decided to iron in some vilene (which helps the banner hang better) and I shortened the hanging tabs.  Having said that, I'm not ready for her to become Quality Control on future designs!

I hope this 4 week project appeals to folks, who can easily adapt the colours and style to suit, use up some scraps, and also get a fun introduction to FMQ.

Monday, 25 July 2011

Have a Heart!

Caroline of Serenity Quilts is having a Heart Appeal in aid of Cancer Research.


Basically she needs as many folks as possible to make & send her a simple 8" square with an appliqued heart on it.  Caroline will then make up quilts to auction.  She wants to raise £400 in August, and has many personal reasons for doing so.  

My mum is recovering from breast cancer so I definitely wanted to support Caroline in her efforts.

I already know what type of heart I'm going to do.  Here's a mini version I made a few weeks back:


If you would like to help in a really easy way, please check out Caroline's blog for more info.  She'd love your support.

Wednesday, 13 July 2011

Hi's and Lo's!

It is with a very heavy heart that I write this post.

Today the sun was shining, and I managed to finally finish a project I'd been grabbing snatches at all week.  It's a project for my new program in September, designed from scratch.  

I was chuffed to bits with how it turned out.  Here's a sneaky peak.


I left it on the dining room table and skipped out the door with my kids for an hour's fun playing tennis in the park.

When we came home, I discovered a tragedy!  I can't even bear to tell you what happened, but it involves my new project and our dog!!!!!!!! 

So to avoid another (pre-meditated) tragedy from occurring (also involving our dog!), I threw myself into making the tea, with way more gusto than I ever show (I hate cooking!).

Maybe when my emotions are a little less fragile I'll fill in the blanks.  For now, look at these pictures of the lovely flowers in my front garden, and hopefully you won't hear the screams of despair in the distance!


Tuesday, 31 May 2011

Creative Block!

As I mentioned yesterday, I've had a roller coaster ride with the mini quilt for my Brit Quilt Swap Partner.

I was pleased with the appliqued heart:


But then, I quilted a grid pattern on the background, not realising the fabric I'd chosen for the back was showing through to the front - booooo!  
Not so obvious in this pic, but trust me, it's there!

I had checked that it wasn't showing through when it was all lying flat on the table, but of course, when you hold it up against a wall, the shadows from the patterned fabric came through!  Aaaarggh!

So I had to carefully cut out my appliqued heart and start again with a new background.

I didn't like the quilted grid effect, so I parked that idea while I explored the other element of my design - fabric leaves.


I initially thought of handmade leaves in the colours of the rainbow, but as I started making them I realised they were way too textured and bulky, and fought alongside the heart, which is to remain the central theme.


So that idea was ditched too! 

After much contemplation and analysing of my partner's inspiration mosaic once more, I remained convinced that leaves were the right way to go, but a softer approach was needed.

So this is what I've come up with:

Not a great pic, sorry, but this baby is 24" square!

Soft greens & aquas, with free motion quilting detail.


I'm liking this much more now - there is balance with the heart, plus it is much more in keeping with my partner's likes (I hope!).

I'm thinking of a simple border and binding to finish - less is more!

So partner, what do you think?

Tuesday, 17 May 2011

First design for Brit Quilt Swap

The old creative grey cells have been stoked up and I've started to see something coming together:


I'm thinking for the green heart I will try using the ticker-tape method (see below for an example).
From Stiched in Colour

The 'leaves' floating in from the side might be rainbow colours, turning to greens as they reach the heart.

Green is a significant colour here!!!!

I'm going to try out my 'homemade fabric' idea for the leaves (blogged about here).
 

While this piece will have an applique feel to it, I want there to be some new textures for my partner to enjoy.

So that's my starting point.  The great thing about creative processing is that if you allow yourself some freedom, you can end up with something that looks nothing like what you started with! LOL!  

Organic is best!